Please be very aware that this information is neither intended nor implied to be a substitute for professional medical advice. Always seek the advice of your doctor or other qualified health professional before starting any new treatment or with any questions you may have regarding a medical condition.
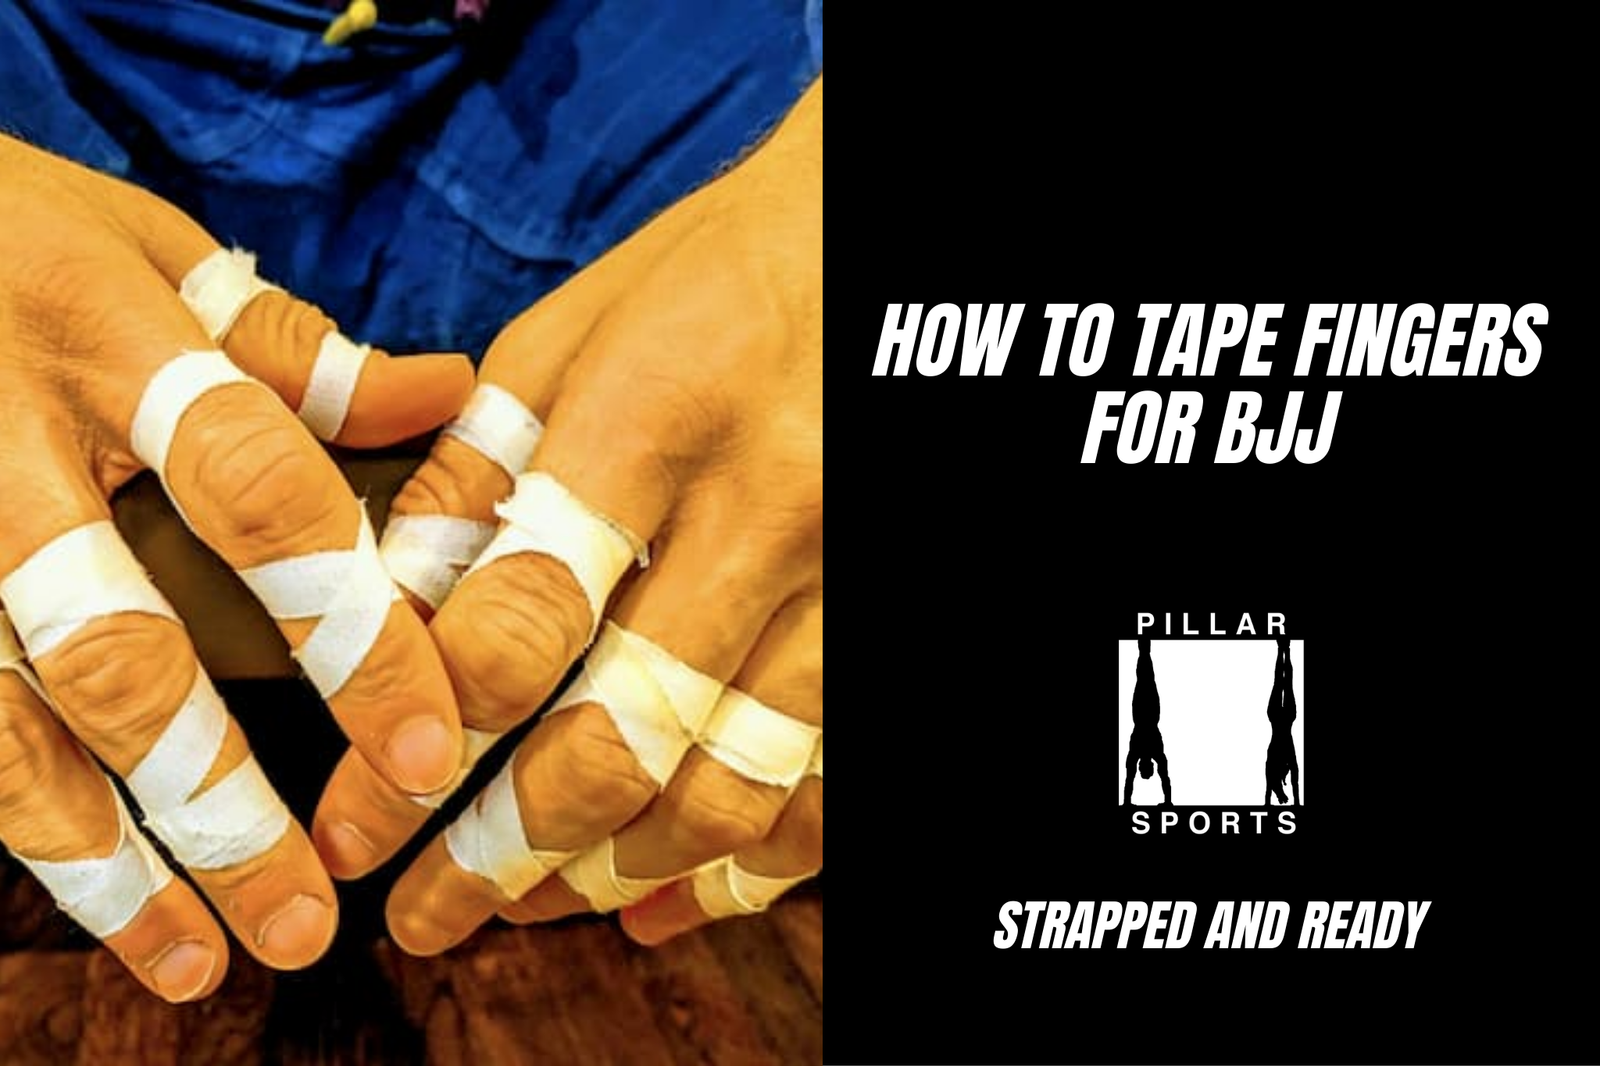
The Grappler’s Two Essentials: In BJJ, two methods are king: the X-Tape for preventing hyperextension during grip stripping, and Buddy Taping for managing sprains by using a healthy finger as a splint.
The “X-Tape” Protection: This technique creates a supportive “X” behind the knuckle. It protects your collateral ligaments from the high-tension demands of Gi grips while still allowing you to close your fist completely for a tight squeeze.
Mastering the Buddy Tape: When training with a jam or sprain, tape the injured finger to its neighbor. The secret is leaving enough slack in the wrap so you can still bend your fingers to maintain your grip on the Gi or lapel.
Don’t Overpay for “Finger Tape”: Most BJJ-specific tapes are overpriced pre-cut strips. You can get the same result by using 25mm Rigid Tape and splitting it down the middle to create custom-width strips.
The Split Trick: To save money, take a roll of 25mm Rigid Tape, make a tiny tear at the top, and pull. It will split perfectly into two 12.5mm strips—giving you double the tape for a fraction of the cost.
Circulation Check: Always ensure your tape is tight enough to stay on during intense rolling but loose enough to allow blood flow. A good rule of thumb: if you can’t make a tight, comfortable fist, it’s too restrictive.
There are dozens of ways to tape, but in BJJ, two methods reign supreme: The “X-Tape” for prevention and the “Buddy Tape” for injury management.
We’ve curated the best tutorials from the community to show you exactly how it’s done.
The “X-Tape” Method (For Prevention & Grip Support)
Best for: Protecting the collateral ligaments while maintaining full dexterity.
This method creates a supportive “X” over the joint, preventing it from hyperextending when your grip is stripped, but still allowing you to close your fist completely.
The Steps:
Here’s a step-by-step guide to taping your fingers for BJJ, as shown in the tutorial:
Start at the base: Begin taping at the base of your finger, making a full circle to create a secure base that won’t slip off (0:00-0:05).
Tape behind the knuckle: Flick your hand to see your palm. Take the tape right behind the knuckle (0:06-0:11).
Cross over the top: Flick your hand again and bring the tape straight over the top of the knuckle (0:15-0:17).
Go between and make a circle: Get the tape in between your fingers and go across, then make another circle around the finger (0:17-0:22).
Observe the cross: Notice that the back of the tape is crossed over the knuckle, and the front goes straight across the two knuckles (0:22-0:28).
Repeat for the second knuckle: Apply the same technique for the second knuckle, making an “X” in behind it (0:28-0:34).
Straight over the top: Bring the tape straight over the top of the second knuckle (0:34-0:37).
Make an X: Flip your hand again. You’ll be looking to make an “X” shape with the tape (0:39-0:43).
X behind the back: Cross the tape in an “X” behind the back of the finger (0:43-0:45).
Straight across and second X: Go straight across the finger, flick it, and make your second “X” (0:45-0:52).
Finish at the base: Bring the tape straight across and finish at the base of the finger (0:52-0:58).
Note: In these videos, you’ll see them using thin tape. You don’t need to buy special ‘finger tape.’ Just grab our 25mm Rigid Tape, tear a small strip at the top, and peel it down. It’s cheaper and gives you the exact same result.
The “Buddy Tape” Method (For Sprains)
Best for: Training with a jammed or sprained finger.
This method turns your injured finger and a healthy neighbor into a single, reinforced unit. We’ve selected this tutorial because it specifically addresses the grip mechanics of BJJ/Judo—ensuring you don’t tape them so tight you can’t grab the Gi.
Here are the steps for buddy taping your fingers for BJJ and Judo:
Start on the “buddy” finger (0:25-0:31): Begin by wrapping the tape a couple of times around the finger you’re taping to.
Create the initial X-wrap (0:31-0:49): Come up from the initial wrap and create a normal “X” pattern over the knuckle that needs support. This “X” is crucial as it prevents the tape from sliding off.
Continue wrapping with slack for bending (0:52-1:07): Wrap the tape back down, making sure to leave enough slack so you can still bend your finger. Then, create another “X” pattern to secure this wrap.
Bring the X back down (1:13-1:19): Continue the wrapping, ensuring the “X” pattern helps to keep the tape in place.
End the tape at the same spot (1:21-1:29): To make it easier to remove later, try to end the tape at the same spot on both fingers.
Position the tape break on top (1:32-1:34): If possible, position the break in the tape on the top of the finger for easier removal.
Check for circulation and mobility (1:36-1:44): Make sure you can still close your hand and that there is good circulation. It’s recommended to tape it a little tighter than you think, as it will loosen over time, but always ensure you can make a nice, tight fist.
Note:In these videos, you’ll see them using thin tape. You don’t need to buy special ‘finger tape.’ Just grab our 25mm Rigid Tape, tear a small strip at the top, and peel it down. It’s cheaper and gives you the exact same result.
The “Economy” Hack: 25mm vs. Finger Tape
Most “BJJ specific” finger tape is pre-cut to 10mm width and can be pricey.
The Pro Move: Buy Pillar Sports 25mm Rigid Tape and use the “Split Trick.”
Take your 25mm roll.
Make a tiny tear at the top edge, right in the center.
Pull firmly—the tape will split perfectly down the middle, giving you two 12.5mm strips for the price of one.